In my previous tutorial, I’ve shown you – how to create localhost? Or how to configure a Windows PC for developing PHP, WordPress, Joomla or other CMS – I’ve shown, how making a server in Windows or creating a local server in Windows for web development. I have created this server with the help of XAMPP software. But today, I’m going to show you, how to install WordPress on this server. Want to know about WordPress? Read Full details about WordPress.
How to install WordPress in the Localhost/Local PC/Windows PC/ Local Server?
Before installing WordPress, make sure that have you configured your Windows PC for installing WordPress? If you have configured, then follow the steps below:
Step 1: At first download the latest version of WordPress CMS from the official website (www.wordpress.org) of WordPress.
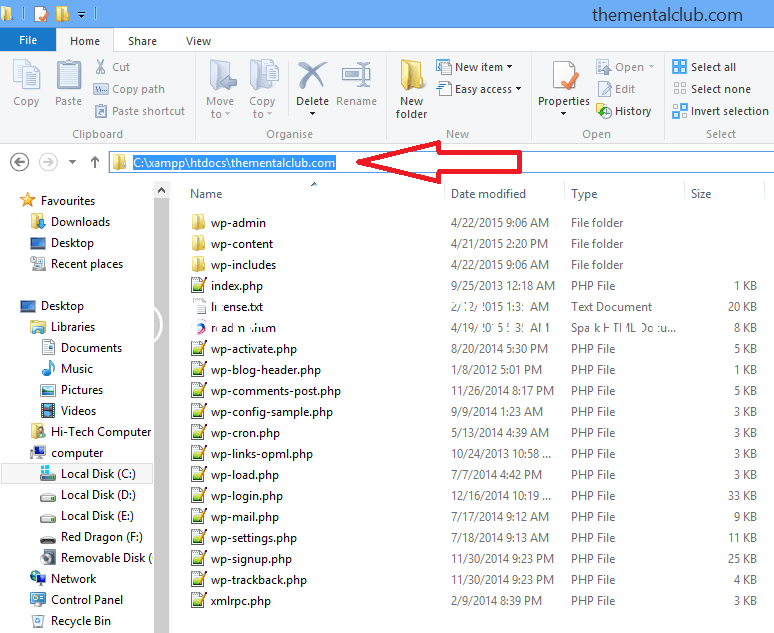
Step 2: After downloading, extract the zip file and after extracting copy all the files from “WordPress” directory and paste all these files into the directory of your website. Like: (C:\xampp\htdocs\thementalclub.com).
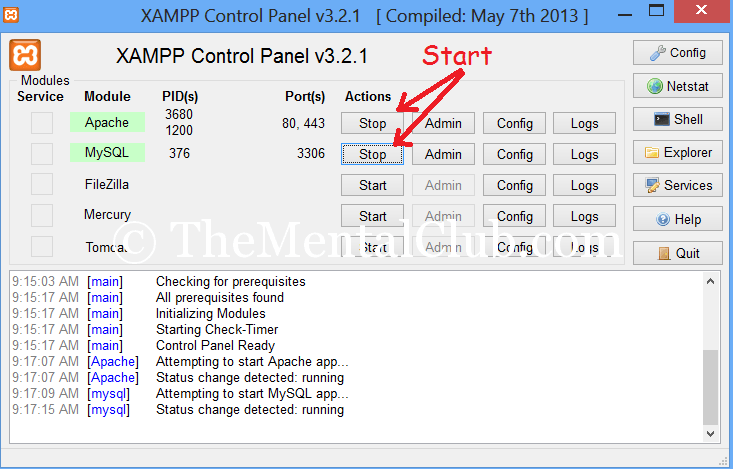
Step 3: Now run the XAMPP software to make a server.
Step 4: Now start Apache and MySQL.
WordPress database creation!
Now you have to create a MySQL database for your WordPress site. Follow the steps below to create a database.
Step 5: Now open a web browser – E.g. Google Chrome, FireFox, IE, Baidu. (Here is a list of top 5 web browsers recommended by the experts).
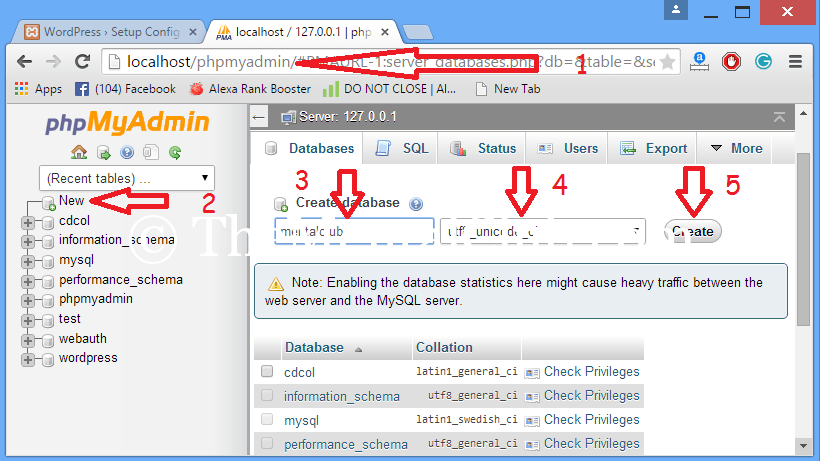
Step 6: Go to http://localhost/phpmyadmin and create a new database by clicking on “New” button à Type your database name à Choose the character set = “utf8_unicode_ci” instead of Collation. Because “utf8_unicode_ci” is the best character set for WordPress. Now click on “Create button” and close the database.
WordPress is ready to install
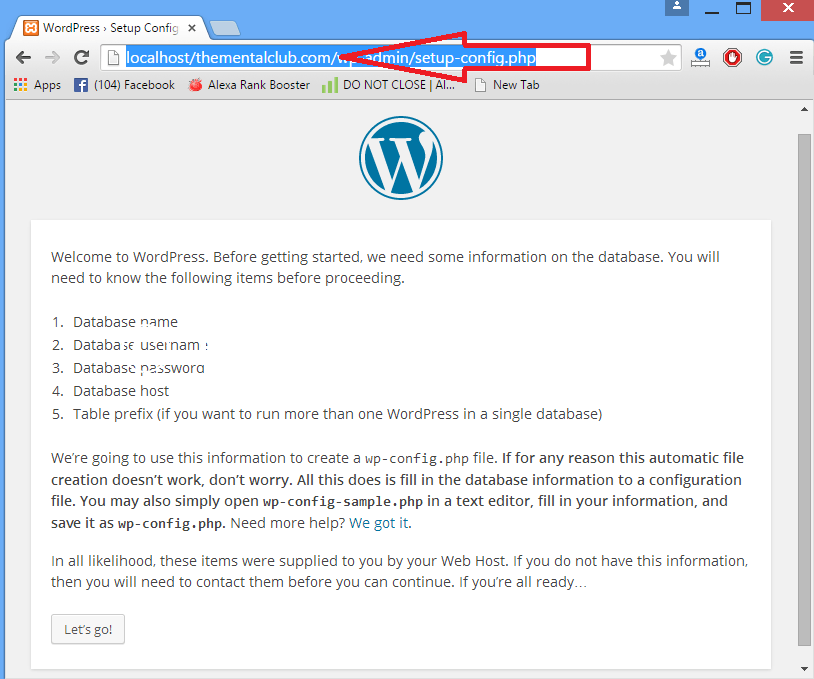
Step 7: At this moment WordPress is ready to install. Just type the URL of your website, like: (http://localhost/thementalclub.com) and hit the Enter key.
Note: Before getting started, WordPress needs some information on the database as below.
- Database name (Name of MySQL database)
- Database username (default username of localhost is: root)
- Database password (No default password, leave it blank)
- Database host (default database host: localhost)
- Table prefix (if you want to run more than one WordPress in a single database or if you want to increase the security of your WordPress site, must change the table prefix when you will create a live site, it is highly recommended by me.)
Now click on “Let’s go!” button.
Step 8: Type the database information as below and install.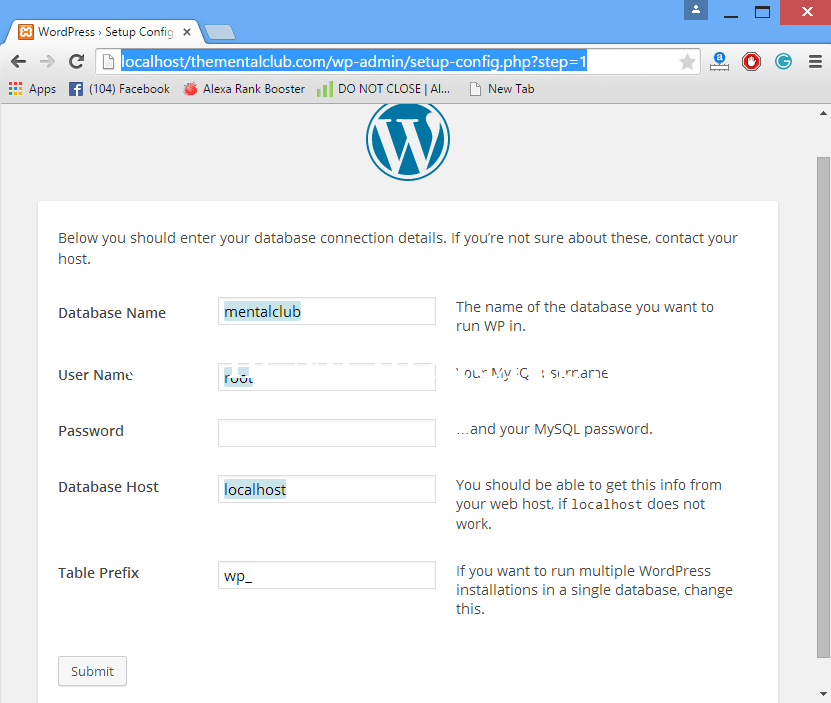
Note: Change the table prefix and choose strong passwords for the live site.
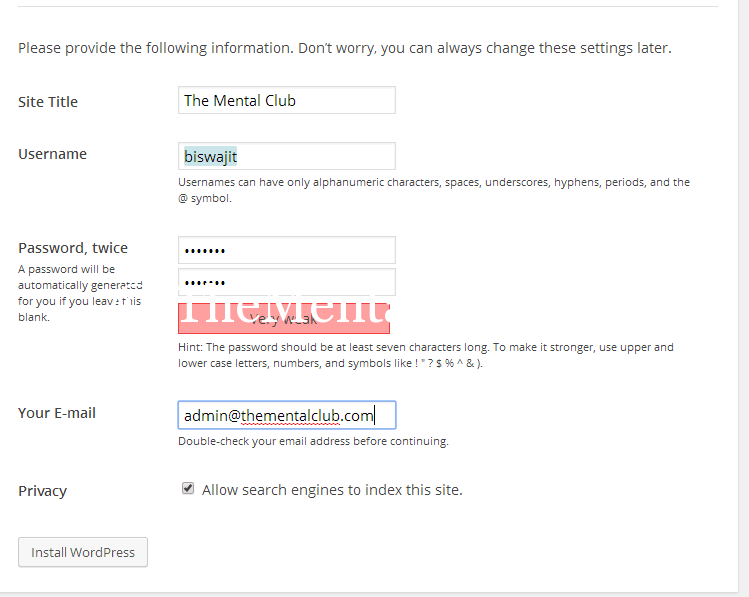
Step 9: Now type your Website information, admin information and password and click on “Install WordPress” button.
Note: You can use Gmail or Yahoo Mail or another email account.
13 Essential Things To Do After Creating A WordPress Blog
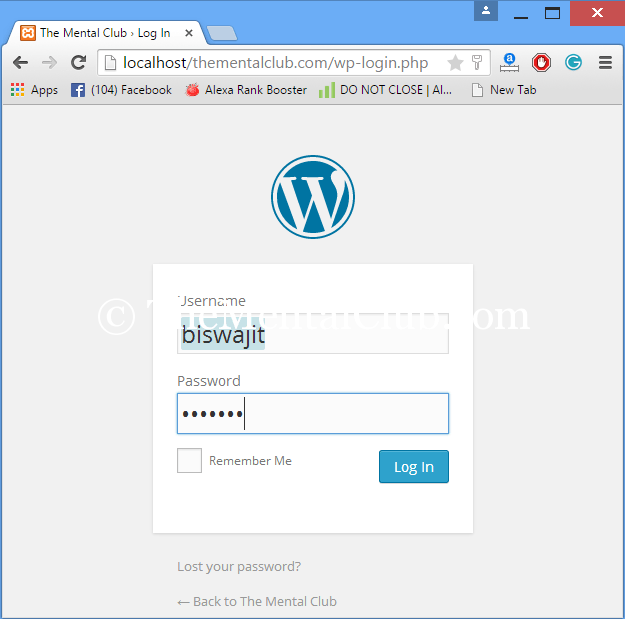
Step 10: Good job! You have just installed WordPress on your local PC. Now you can login, click on “Log in” button to log in.
Procedure of WordPress installation into the Localhost or Local PC or Local Server [Watch]
Thank you…


