


Click here to get all articles about e-Commerce (Index Page)***
Previous Article: 3. Joomla and E-Commerce [Part-4] (Product Catalogue Feature, Payment Module & Shopping Module)
4th Chapter
Joomla Environment Setting (Joomla Server Setup)
Though Virtue mart can’t run itself, so at first you have to do the settings of Joomla environment.
4.1. What is Joomla Environment?
Before installing Joomla, you have to make your computer useful for Joomla installing. That is, you have to make an environment for running Joomla software. So, you have to make your computer a server one. Without a server, Joomla can’t run. Joomla is the software of the combination of PHP, MYSQL, CSS, JAVASCRIPT, XML, and HTML. Without server, PHP and MYSQL can’t run.
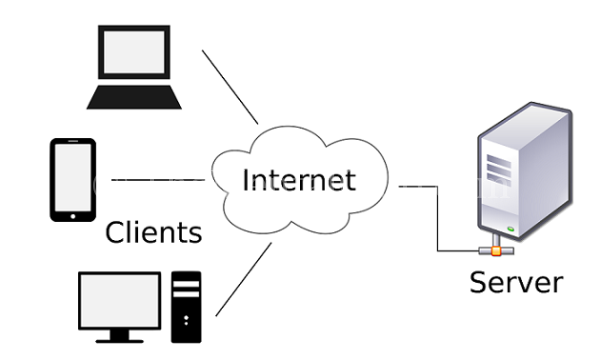
4.2. What is Server?
A server is a special computer which provides services to the other computers and you can handle your dynamic website in that computer. For the kind information, you can also make your computer a server computer. But, how do you do it? Don’t worry, just follow the below topics. Read more at Wikipedia about the server.
4.3. How do you make a Server Computer?
At first, you have to collect XAMPP software. You can collect it by two ways. Firstly, you can download it from this link https://www.apachefriends.org/download.html or you can download it by typing in Google such as XAMPP for windows. You have to do nothing, just copying this software from our CD and store it on your drive or on your desktop. It is very easy to install this software. You install this software just like the other software installation process. But don’t worry, just follow the below steps.
4.4. Server Installation
Step 1: After downloading the “XAMPP” for Windows, Double Click on XAMPP-win32-5.6.1…-installer.exe file.
Click here to get the video tutorial.
Step 2: SELECT A LANGUAGE, in there you select the English Language and Press on “OK” button. After that, a message comes in front of you just like the below picture.
Step 3: Now in the above message named “Welcome to the XAMPP”, you click on the “Next” button. Next, you will get just like below picture in where you will see the text “Choose install Location” i.e. in which drive of your computer, you will store the XAMPP Software. If you do not make any change, then by default, this will store on ‘C’ drive.
Step 4: Now click on the “Next” button. After clicking on “Next” button, you will get a message just like the below picture.
Step 5: Now, give tick sign in “Install Apache in Service” and “Install MYSQL as service“.
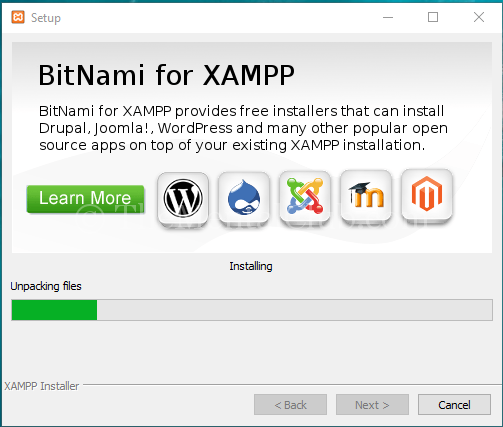
Then, click on “Install” button.
Please wait until completing the installation process.
Now, click on “Finish” button.
Click “Ok” button.
Click “Yes” button.
Then, XAMPP Control Panel Box comes in front of you. In here, Apache and MySQL are in the running position. If these are not in the running position, then click on the “Start” button of the Apache and MySQL options. So, your PC is now a server PC. Now, you come out by clicking “Exit” button.
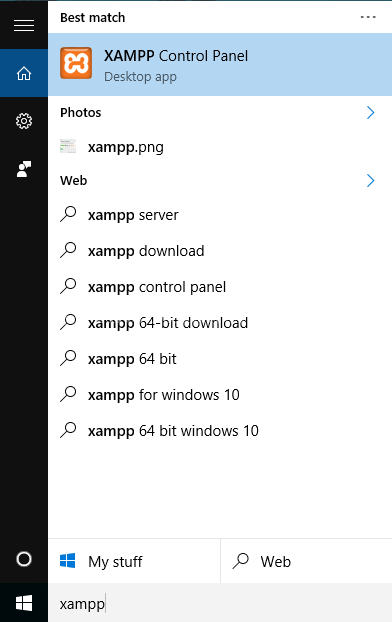
Later, you may bring the XAMPP Control Panel Application in the two ways. The first stage is the icon may stay on the desktop or Another stage is Start -> Search for “XAMPP Control Panel”, just like the below picture.
You may make your server Pvjy by XAMPP Control Panel may shut it. But, in many times, during the starting times of the computer the XAMPP automatically starts it. Then, there is no required to start it again.
Problem! Watch the video tutorial
Also Read: Procedure of WordPress installation into the Localhost or Local PC or Local Server
Next Tutorial: 4. Joomla Environment Setting [Part-2]
Thank You!


 – Bangla Typing Software Download")
")


 E-Commerce Business Model")

