What is VPS?
VPS = Virtual Private Server. A physical server is divided into virtual container or slice through virtualization software. Each slide performs quite differently, like a dedicated server. All tasks are performed as an each independent dedicated server. The System does not understand it that is it running on hardware or on a virtual machine? The companies rent 15-20 VPS in a one machine by adding disks and high speed processor. Suppose, your PC is your dedicated server. Through using the virtual box, the installed operating systems are each VPS.
Set up Webuzo, Nginx Control Panel and also host your WordPress site.
VPS = Virtual Private Server.
The configuration of VPS:
Dedicated CPU Power 2.00
Disk Storage 20 GB
Data Transfer 2000
Dedicated Memory 512 MB
Dedicated IP Addresses 2
How does it divide logically? The hardware of a dedicated server is not divided equally. So, it is divided in the ratio. For example: the memory is 4 gigs. I take 2 gigs. The rest of the two have taken 2 gigs. The rest of the two have taken 1 giga 1 giga , total 2 gigs. As I have bought a lot of memory, so I can use CPU for a long time. The sharing of hardware is done in two ways. I will discuss about it in the next chapter.
However, you have bought a VPS. And you want to install a CMS by giving others WordPress.
To run the site, we have required webserver, MSQL server, PHP myAdmin, FTP server. But, there has required a lot of time to install it. If we use control panel, then control panel will install all and we easily manage the website. So, we will install Webzo panel. Webzo is a light panel. Because, it uses less RAM and the support of Webzo is good. If you face any problem, then Webzu will support you.
Requirements
Newly installed CentOS 5.x (x86 or x86_64) / CentOS 6.x (x86 or x86_64)
YUM
RAM – Minimum 512 MB (Recommended 1GB for best performance)
Disk Space – Minimum 5GB (Recommended 10GB for best performance)
Note: There should be no PHP, Apache, MySQL installed on the server
You login in the VPS by through Putty. You update the operating system. To update it, you write commands.
yum update
First of all, remove apache, in many time apache is already installed with the CentOS. This apache may conflict with the webuzo. So we remove it through the below commands.
yum -y remove httpd
How do you Webuzo?
Run this below command into the putty.
wget -N http://files.webuzo.com/install.sh
chmod 0755 install.sh
./install.sh

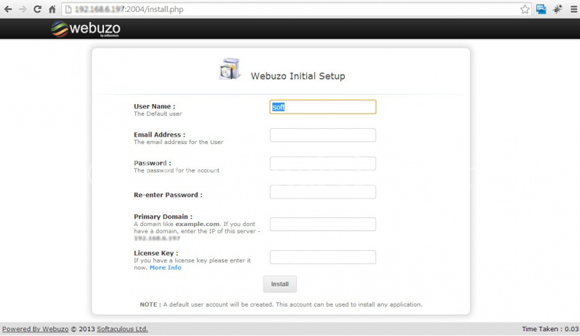
After sometime, the installation will be completed. Then you visit on this site: http://Your-IP:2004/. (Your IP: your IP of VPS). Now, you have to complete the rest of the steps. So, you have to visit in this address: http://Your-IP:2004/. (Your IP: your IP of VPS). You can watch the like the below picture.
You have to give the username. This user is the C-panel user name. Next, you login into the panel with this username.
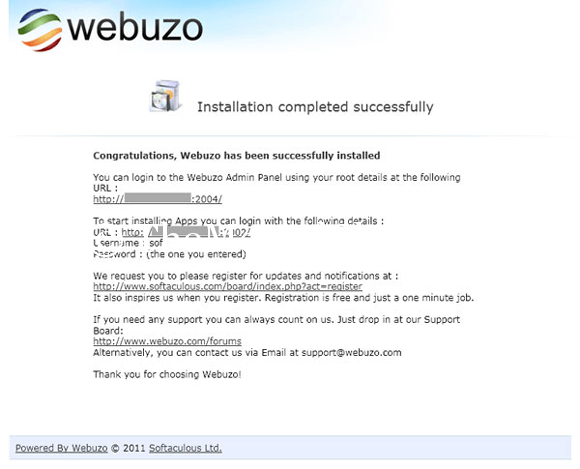
Now, write the E-mail ID, password, and domain name and click on the Enter button. After completing the installation, you will watch the picture like below.
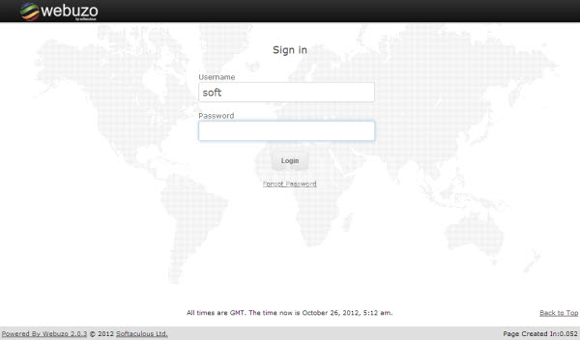
Login:
There are two sections of Webuzo.
Admin Panel
To login to the Softaculous Webuzo Admin Panel, visit the following URL : http://Your-IP:2004/.
Enduser Panel
To login to the Softaculous Webuzo Enduser Panel, visit the following URL : http://Your-IP:2002/.
The username and password will be the same that you entered during the Initial Setup
Now, login into the Enduser Panel.
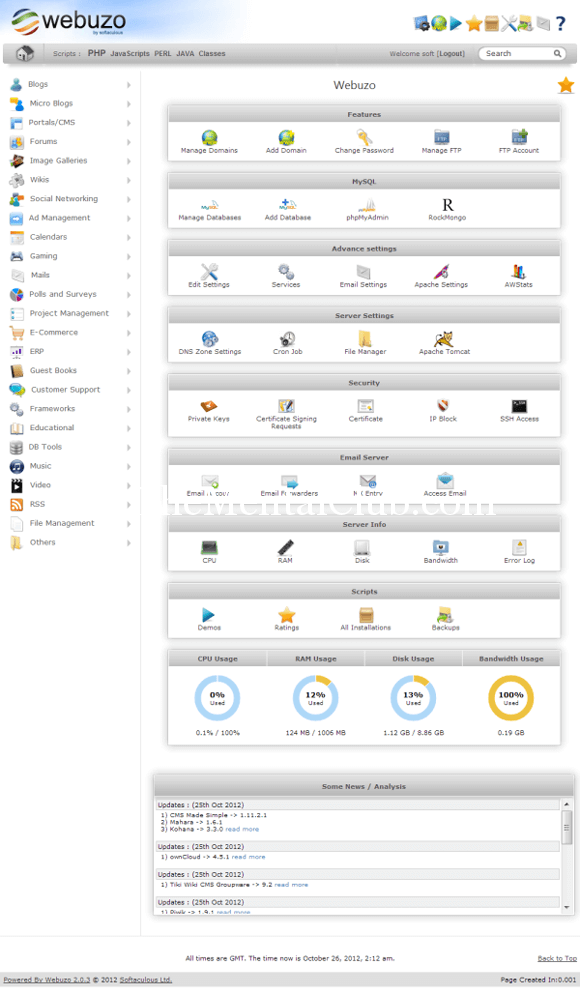
After Login, you may watch a panel just like the below picture.
Now, I will install nginx. Now, a question will come in your mind that what is nginx? Nginx is the webserver like apache. Apache can handle more connections and use less resources. The Ngnix is the best web server for a high traffic website. How do I install nginx?
No command line is required for installing nginx in the Webuzo. We can easily install nginx from a webuzo panel by using a one click. Let’s start:
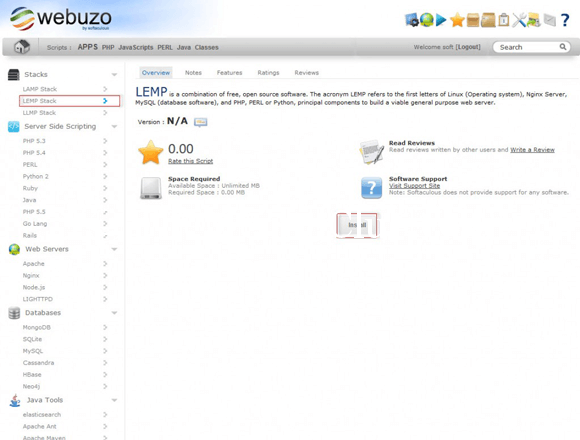
1) Install LEMP from the Webuzo Panel >> Apps >> Stacks
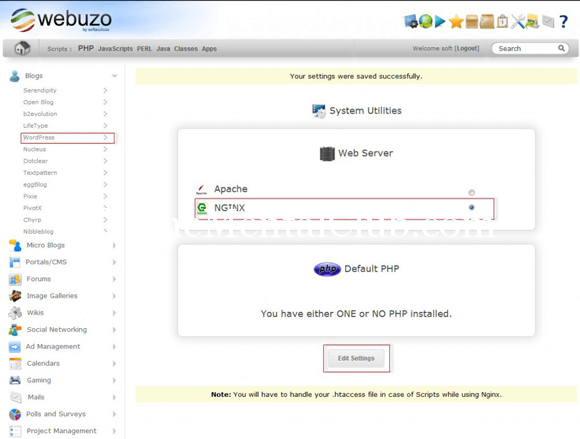
As the apache is automatically installed, so you have to change the nginx to apache.
Click on the Webuzo Logo. Go to System Utilities and select Nginx. Then click on the Edit settings button.
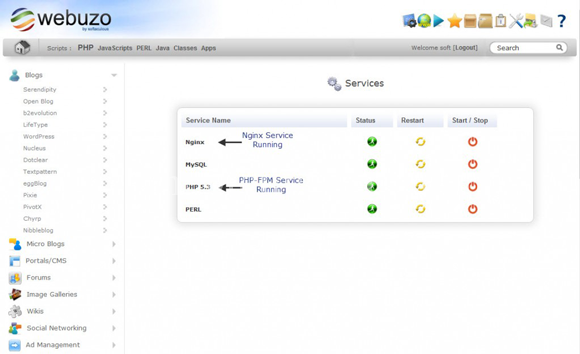
Confirm nginx is running from Webuzo Panel >> Services Menu
It is just for today. You have to wait for the 2nd part of the rest of the tutorial.
Note: if you want to read it, then you visit in here: http://blog.hostpair.com/.




![Illustrator CC [2017] One-on-One: Fundamentals | Tutorials [Downloadable HD Formatted Video Series – Learn Step By Step] Illustrator-CC-[2017]-Full](https://thementalclub.com/wp-content/uploads/2017/05/Illustrator-CC-2017-Full-100x70.png)


