


Everybody who wants to use the Operating system is Apple Mac OS X. It is an own Hardware integrated operating system of Apple. The main thing is that to get the original taste, there is a no substitution of Apple computer.
Install the apple mac os x 10.9 mavericks on your windows pc.
Today’s tune, I will try to show you that how do you install Apple Mac OS X 10.9 Mavericks on the Windows machine? In here, I am using the Windows 8 Operating System as a host machine. Now, I will install Mac OS X 10.9 Mavericks. In here, you can’t get the real power of MAC but the performance depends on Processor and RAM.
The Required things:
- Windows 7 or 8 (I have installed in these two operating systems, but you may try it on Windows XP. Hopefully, it will do).
- VMware Workstation (I will give you a torrent link.)
- Mac OS X 10.9 Mavericks VMware image file (I will give you torrent link.)
- System with Intel VT or AMD equivalent technology.
- 30GB-100GB hard disk space (at least 10GB is required, the more space the more chance to store your documents and you may install more applications.
- At least, minimum 6 GB RAM. (Because, I have seen that below 6 GB RAM, the performance is bad. I have allotted for the Guest Operating system for 6GB RAM and 3GB RAM. You can allot for MAC i.e. your PC, RAM would be more, than you can allot for RAM guest operating.)
Let’s start the mission:
http://www.1337x.to/torrent/634859/VMware-Workstation-10-0-0-Build-1295980/
https://www.dropbox.com/s/s94w1ry5l2vkog7/%5Bkickass.to%5Dos.x.mavericks.10.9.retail.vmware.image.torrent?dl=0
- First of all, from above two links, download VMware and Mac OS X 10.9 Mavericks VMware image file. The size of this file is only 4.81 GB.
- Go into the BIOS settings and enable VT or Virtualization Technology.
- Extract Mavericks zip file.
- Install VMware Workstation.
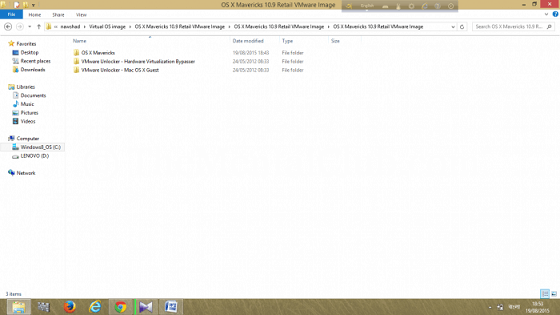
- After extracting the ZIP file, the folders will show the picture which is shown below.
Now, VMware Unlocker – Mac OS X Guest -> VMware 8.x + 9.x + 10.x Series -> VMware Workstation Unlocker – Windows ->install.cmd: if you enter inside the folders by following this order, then you will see the install.cmd file. Right click on the install.cmd file and click on the Run as administrator. It will install the tool darwin.iso in VMware. It may do in case of you. (It does not work in the case of mine, later I have manually installed it. It may work in the case of you, guys. Finally, I will show you manually, the VMware installation. Its main task is to copy any file from a MAC to windows. If it does not install it, then you will not watch the any file of downloading in MAC on Windows.)
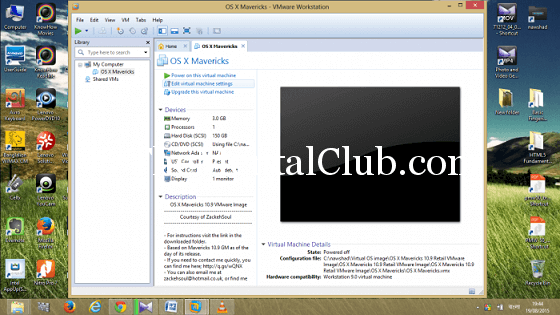
6. Right click on the VMware Workstation and click on the Run as administrator. Open VMware workstation. Click on the Open a Virtual Machine which is shown as below.

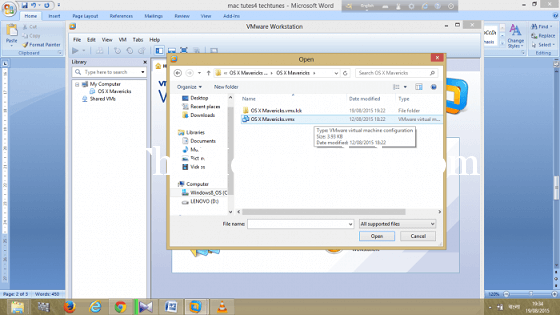
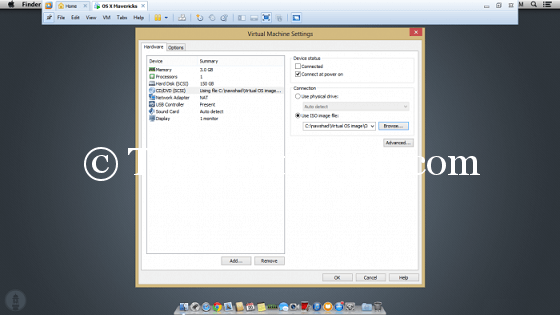
Go to the OS X Mavericks folder and in OS X Mavericks, open the VMware image file. (Picture 3) On the file extension show option. In the picture, you do not get puzzled because as the MAC is installed on our machine, so many files and folders are shown.)
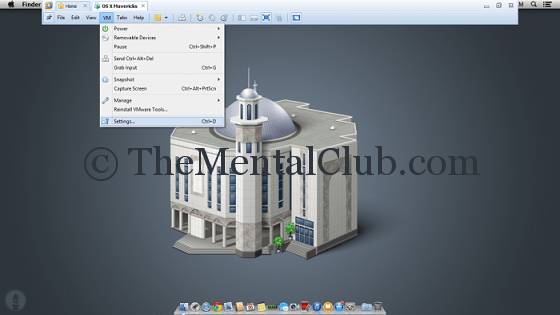
7. Click on the Edit virtual machine settings just like the below mentioned picture.
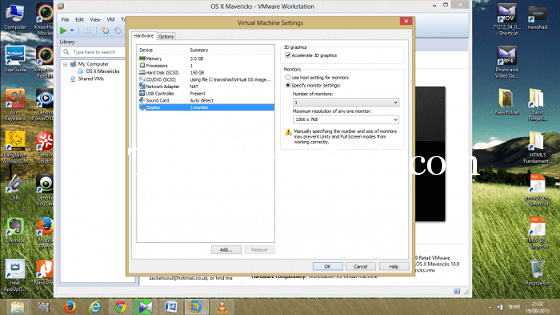
8. Select the settings of Memory and Processors as the picture which is shown in below.
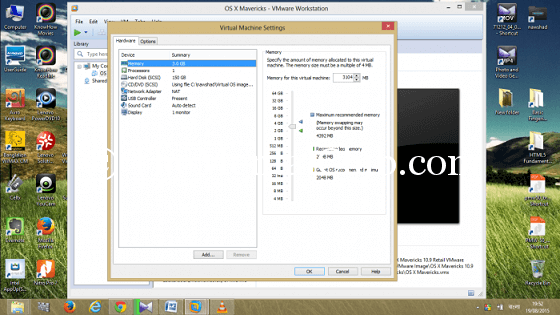
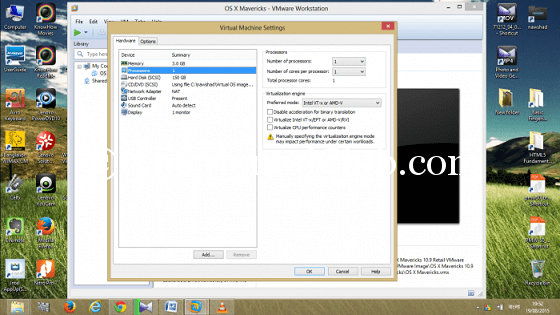
If you want to assign the memory, for example: 2GB RAM, then select 2048 MB. If the RAM of your PC is more, then select more RAMs. Mind it: the more RAM, the better performance.
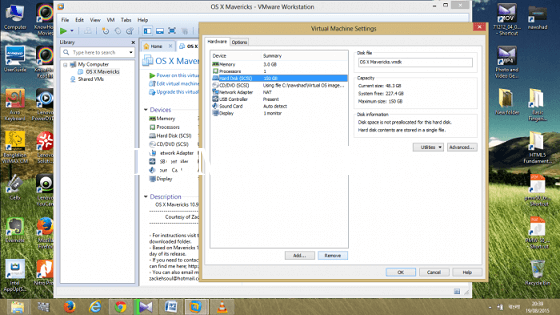
9. Select on the Hard Disk (SCSI) and click on the remove button. Then click on the ADD button. (Image: 7)
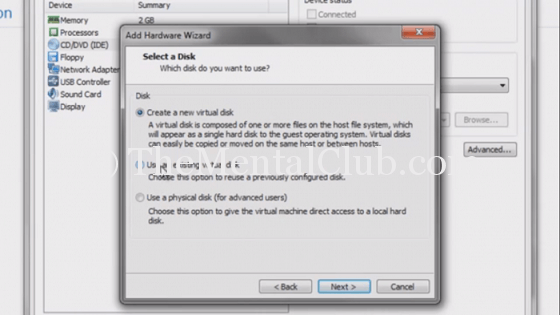
After coming the Add Hardware Wizard, select the Hard Disk and click on the Next button. After coming Select a Disk window just like the below picture, click on the Radio button in Use an existing virtual disk. (Image no: 8)
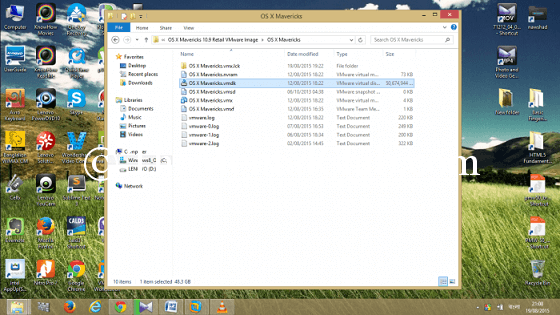
Next, browse it and select the OS X Mavericks.vmdk (Image no: 9) in the folder of OS X Mavericks and click on the Finish button.
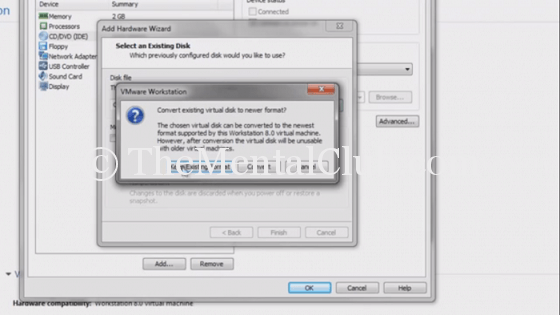
After coming the Format window and select the Keep Existing Format button. (Image no: 10).
10. Just like the picture which is shown in below, set the display settings. In this case, select the Resolution of the monitor of your laptop. If it is not in listed, then write manually, and select the Resolution.
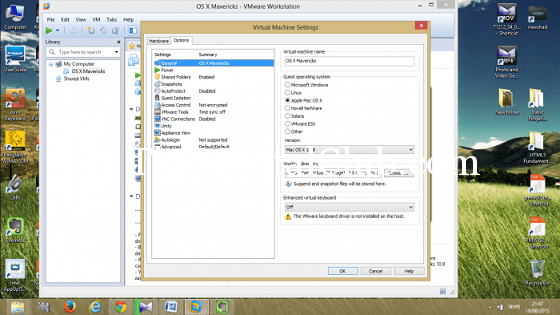
11. Go to the Option TAB just like the below picture (image no: 12) and please make sure that everything is ok or not.
12. If you want to access any drive or folders from MAC, then enables the Shared Folders option (image no: 13). Though enabling, you can not access any folder or shared drive if the VMware tool does not installed. (Step: 5. No tension).
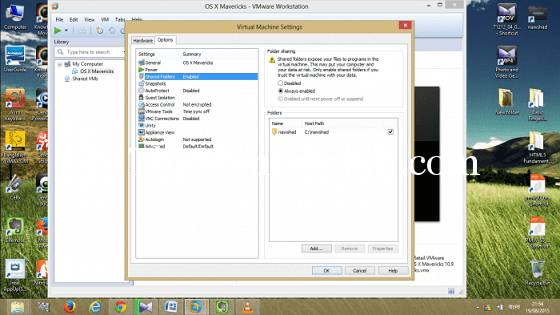
Now, select the always enabled option and click on the Add button. After coming the Add Shared Folder Wizard, click on the Next button. Click on the Browse button in the room of Host Path and select the Drive or folder and finish it by clicking on the Ok button. By the way, you may also install it in the room of Mac Install.
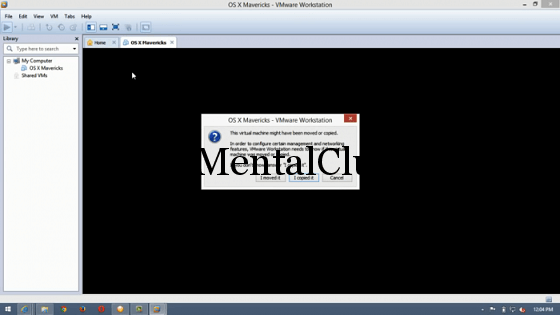
13. Now, click on the Power on this virtual machine button. Just like the below picture (image no: 14), click on the Copied it option and just click on the Ok button back to back.
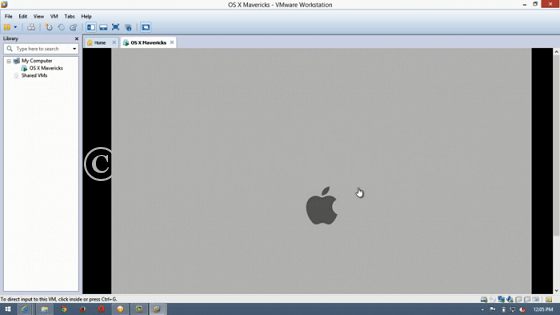
14. (Image no: 15 and 16) will come. Click on the Continue through the images.
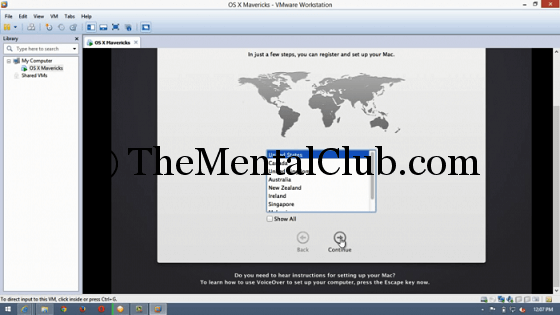
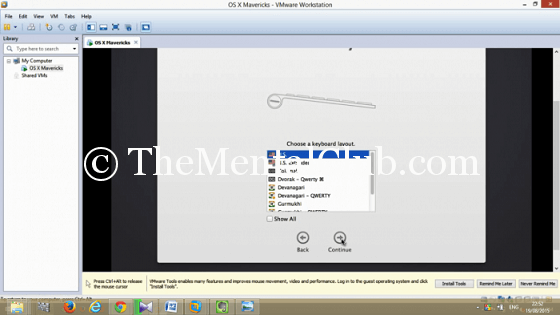
15. As a Keyboard layout, select US. (Image No: 17).
16. Just like the picture, click on the continue button.
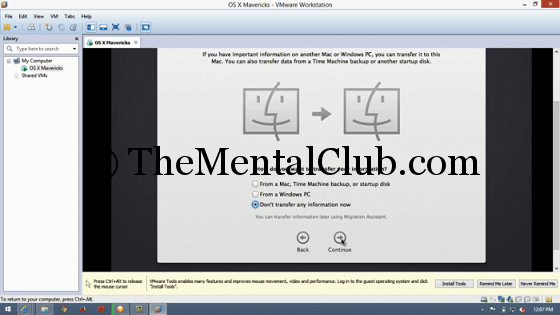
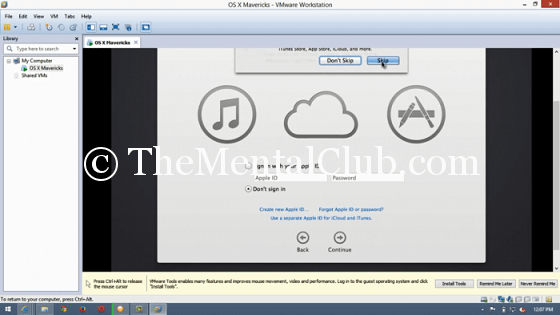
17. By selecting the don’t sign in, click on the Continue button and select the Skip option.
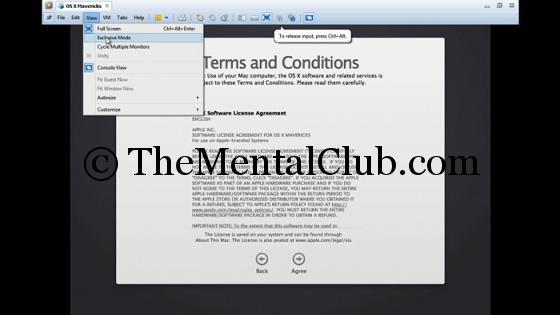
18. Just like the below picture, select the Exclusive mode and do the full screen and click on the agree button of terms and Condition. You can quit from the Exclusive mode in VMware by pressing together Ctrl+Alt button.
19. If the (Image no: 21) will come which is shown as below, then give a password and password hint and uncheck the Send Diasnostics & Usage data to Apple button and click on the Continue button.
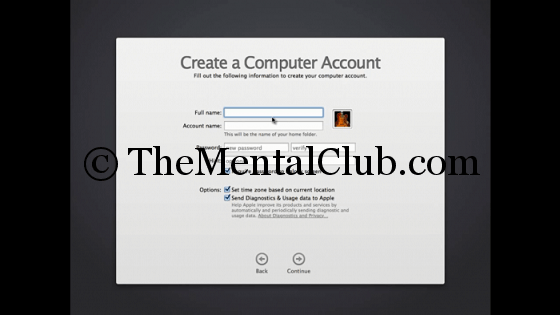
20. Now, create the account. If (Image no: 22) will come which is shown as below, then click on the “Don’t register” option and click on the Continue option. Next, click on the Skip option.

21. (Image no: 23) will come. And wait for some time and watch that Apple Mac OS X 10.9 Mavericks has installed ad will show the Desktop of MAC.

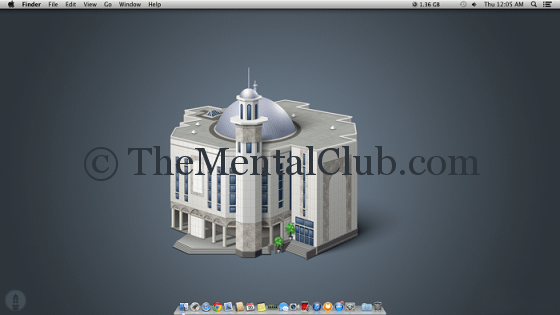
Congratulations, your MAC OS X has installed.
Now, I will tell, you that how do you install the darwin.iso?
A. According to the (Image 24), click on the Settings options.
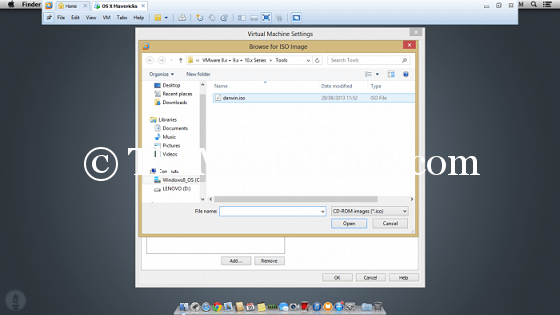
B. According to the (Image 25), select the option CD/DVD and give two tick options in the Device status (In the image, there is no tick sign) and then click on the Browser option (image no: 26) and click on the open option of darwin.iso.
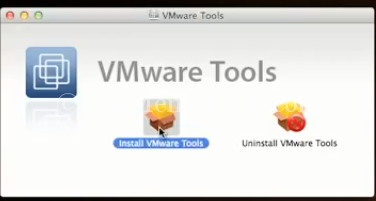
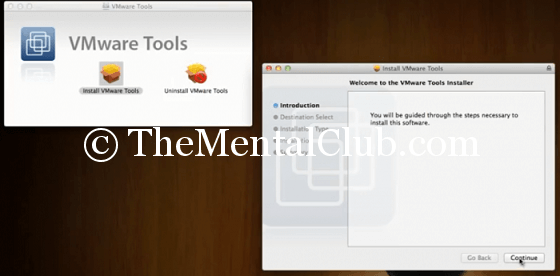
C. According to the image 27, click on the Install VMware tools.
D. According to the Image 28, click on the Continue option.
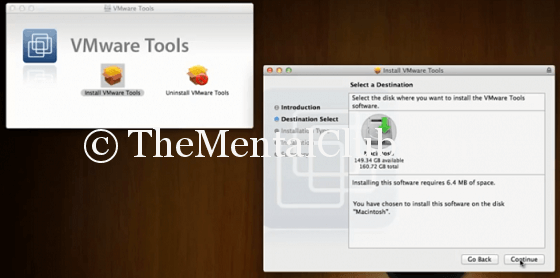
E. According to the image no 29, click again on the Continue option.
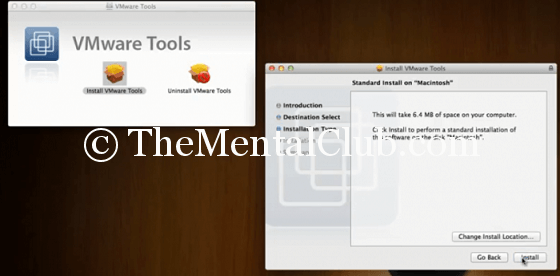
F. Click on the Install option. (Image no: 30).
G. Verify the user name and password of your MAC. (Image no: 31).

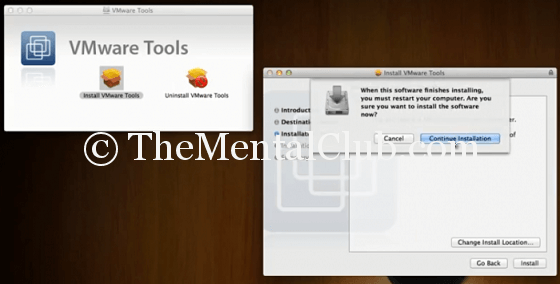
H. Click on the Continue installation option. (Image no: 32).
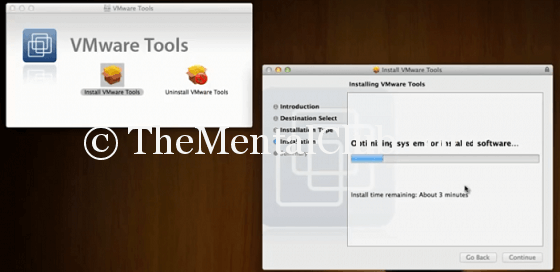
I. according to the Image no: 33, you will see the Installation progress.
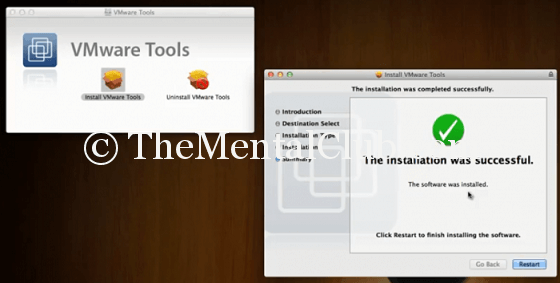
J. And finally done and press restart. (Image: 34).
Now, by the processing of drag and drop, you can copy any file in guest and host operating. I have been using Mac OS X Maverick since 1.5 years. As a result, I am free from virus. I always open Pen-drive in MAC. Oh yes, your windows key will work as command button in MAC.
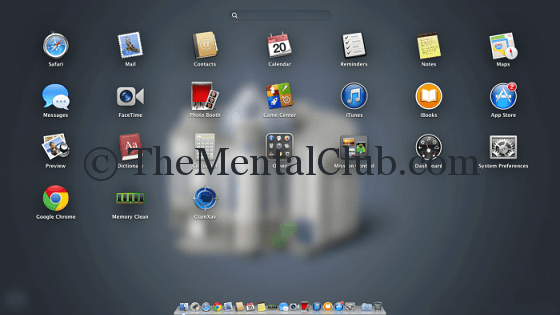
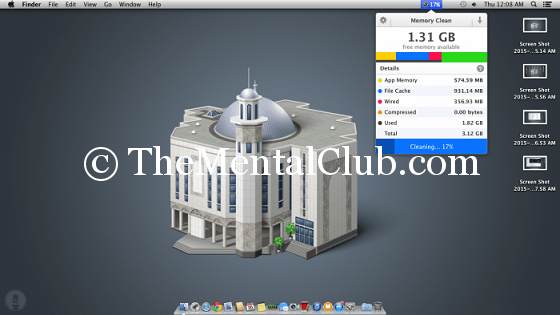
If you follow as my instructions, then you do not face any difficulties. If you have Apple ID, then you can install it from your itune store. But, I have only installed only Memory clean app and Mac Chrome Browser.
If you face any problems, then please leave your comments and if you like it then please leave your comments.
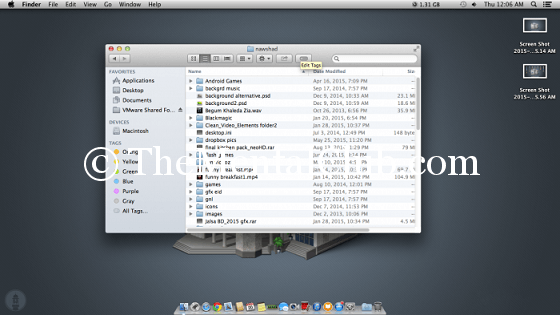
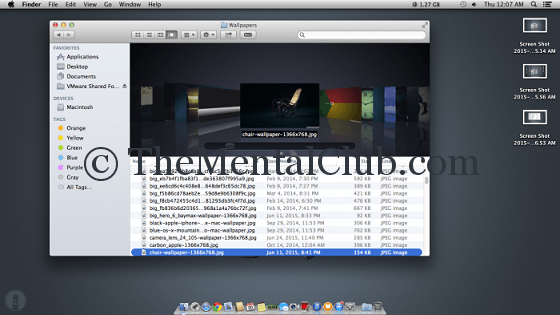
I have given some screenshots of MAC.
Good Luck!


")

 – Bangla Typing Software Download")
")


