Today, my article is: Use of Google Public DNS in PC and Smart Phone.
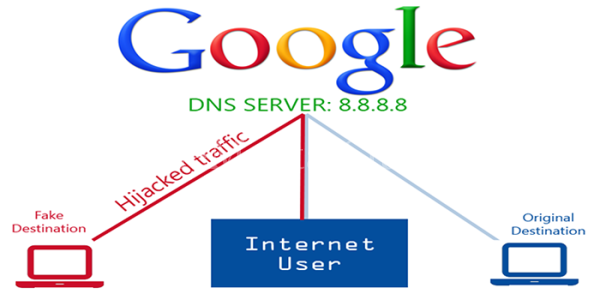
DNS term comes from Domain Name System, which controls the website’s domain name and email settings. When you visit any website then which server you will use is controlled by the DNS. For example, if you use Google DNS then you will use the Google server during visiting internet. When we connect to the internet, then ISP automatically provides default DNS. But, the problem is that default DNS is not so speedy. For this, we can’t get the desired speed. Generally, in two ways, Default DNS is changed into Google DNS. Firstly, by changing manually settings and secondly by using software. You can change the DNS settings, both in PC and in Android phone. Let’s start it.
Manual Settings- Use of Google Public DNS
Google has a public domain name system. You will enjoy the high speed internet browsing. For expert computer users, I am describing manual process. The second process is for those whose hands are shaking for holding the mouse. It seems to me that it is the most beautiful method. However, please note the following with respect to each step.
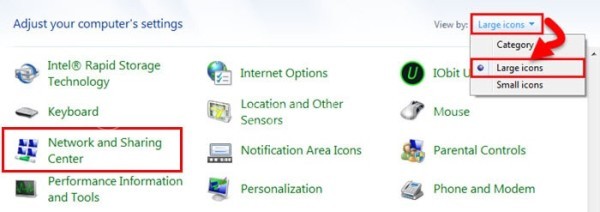
- Go to the Control Panel, as shown below, from Control Panel, you click on Network and Sharing Center.
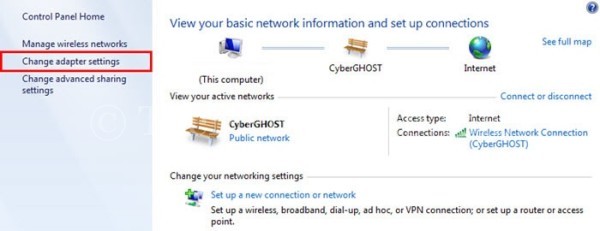
- Now, you will watch this just like the below picture. You click on the “Change Adapter Settings” just like the marked picture.
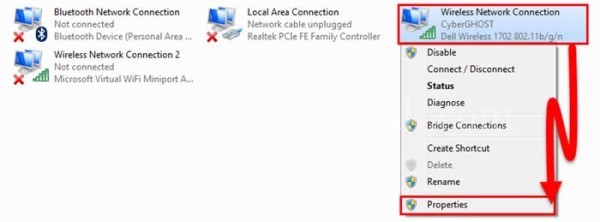
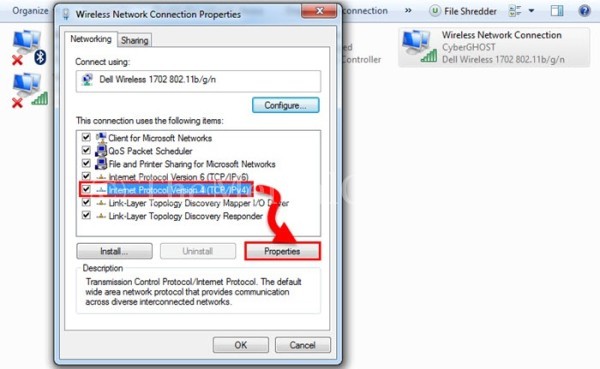
- The following image is the first to be sure that which adapter you are using. For example, I am using CyberGHOST adapter. Basically, this is my router’s name. Now, in which adapter do you want to change the DNS; you click on the right button of your mouse and go to Properties option.
- Now, you select Internet Protocol Version 4 (TCP/IPv4) or Internet Protocol Version 6 (TCP/IPv6) from Networking Tab.
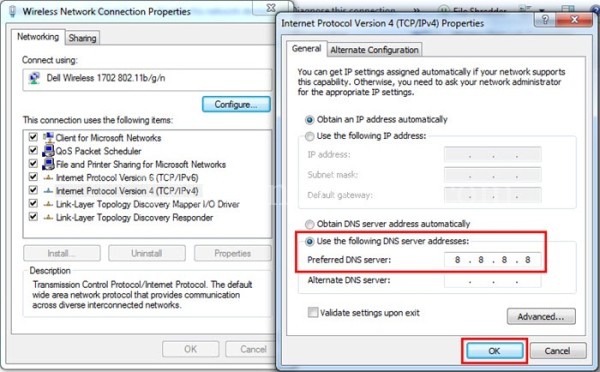
- As shown in the image below, you type 8.8.8.8 or 8.8.4.4 for IPv4 and for IPv6, you type 2001: 4860: 4860:: 8888 or 2001: 4860: 4860:: 8844.
- Your work has completed. Come out by pressing the “Ok” button and restart your connection. You are welcome on the Superfast Speed Internet.
DNS Change by Using Software
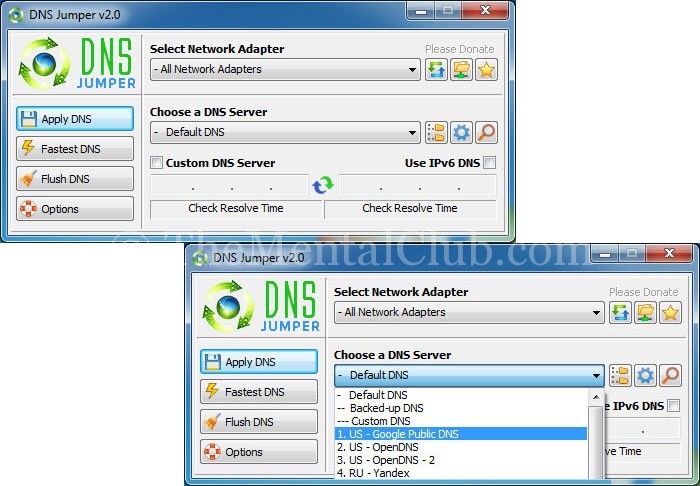
If the above task is thought to be a difficult one, then you may do this by using software and then, it will be a very easy one. The name of this software is DNS Jumper. Click here to download this software and open this software as usual. Now, you will see just like the below picture. By using this software, you can manually change DNS if you want or by selecting the Google Public DNS and press the apply DNS.
Click here to get an application for android phone. I do not use the applications for android phone, so I can’t tell you about its method. This app is made by the same manufacturer, so the settings will be same.
Last Word
If you like this tune and if you have a problem in understanding this tune, then, you are requested to leave a comment. Because, your comments give me encouraging to write good quality of the article. The last but not the least is that, please give up copy and paste policy and please encourage us for writing good quality of the post. See you in the next post.


