


A screen recorder would be one of the most useful tools that make life easier. It can be used for many practical uses, such as creating a program video tutorial, recording live games, educational lessons for students, etc. RecordCast is an online screen recorder that helps in recording the screen without downloading any software or extension. It is one of the easiest-to-use screen recording tools that enable users to capture screens with sound and images with one click.
Free RecordCast lets you capture screens and videos with ease. What sets it apart is that it is completely free to use and free from ads and watermarks. Flexible recording features are supported:
- Screen recording or webcam only.
- Screen recording with a camera.
- Record sounds from Microphone and system sound simultaneously or separately.
- Record the entire screen or the application window or a browser tab
With a few clicks, you can record your screen and capture your face. Besides that, it comes with a built-in video editor and aids in recording and editing the filmed videos.
How to record a video on YouTube as an example
1. Open the website
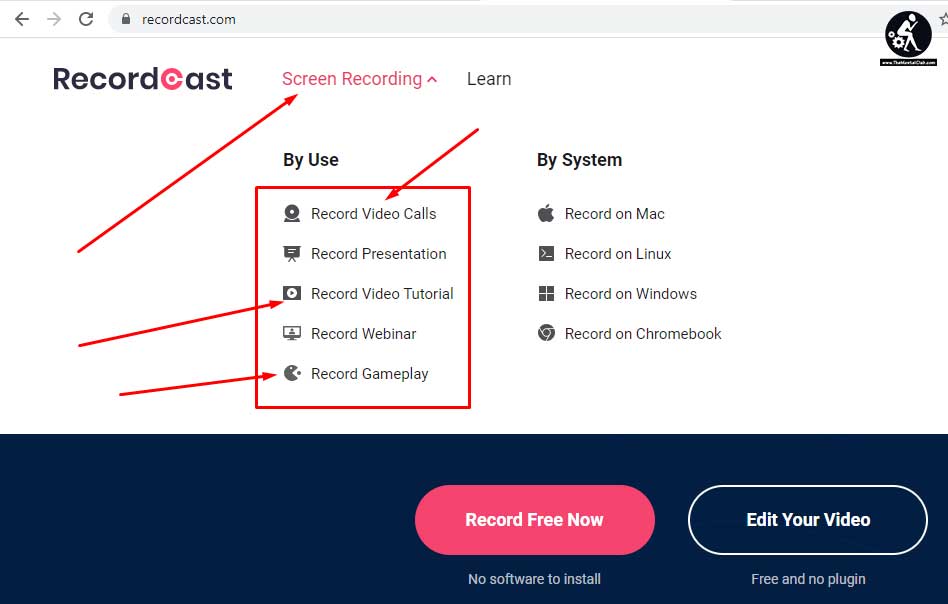
Visit the RecordCast homepage and click the button “Start Recording” to start.
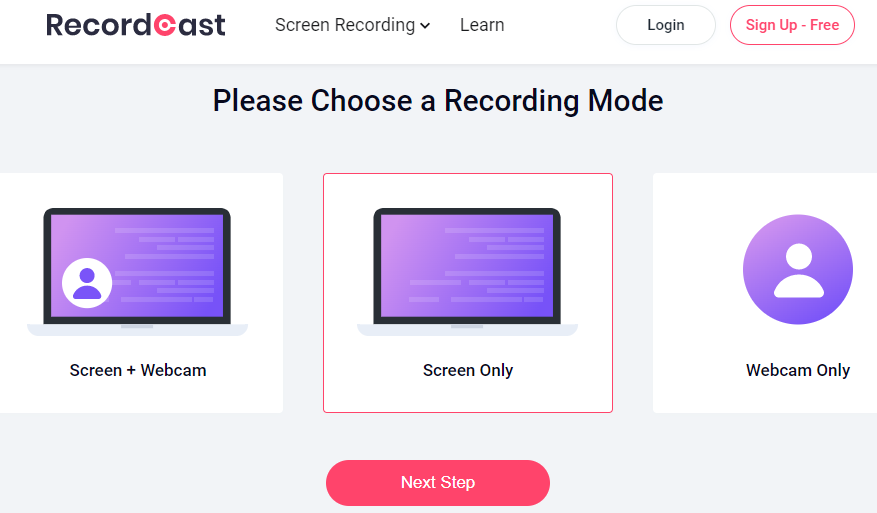
2. Select a recording mode
RecordCast offers three modes for you to choose from. They are Screen + Webcam, Screen Only, and Webcam Only. You can choose Screen + Webcam to record your screen and your face at the same time. Of course, you can select screen Only for recording the only computer screen. Then click Next Step. Here, Let’s select “Screen only” for online YouTube video recording.
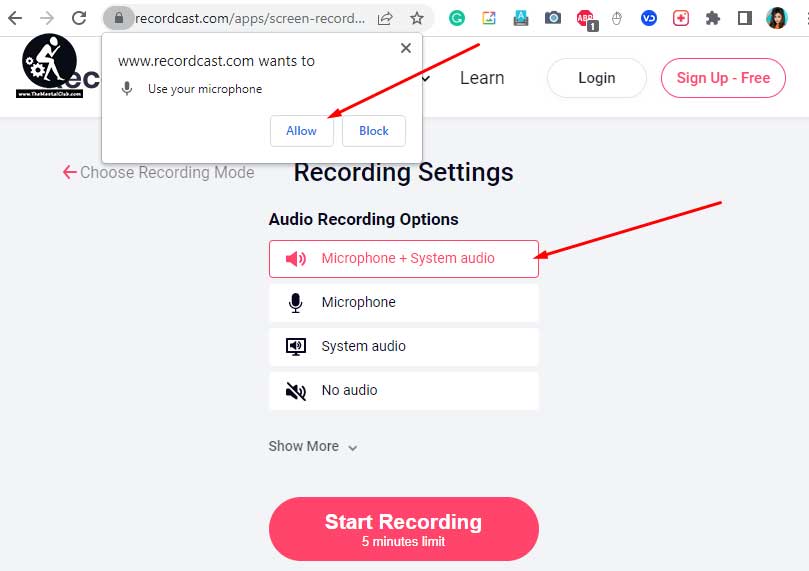
3. Choose the way to record sound
As you can see, it provides four ways to enable sounds for your video, namely “Microphone + System audio”, “Microphone”, “System audio” or “No audio”. Choose one and press the Start Recording button.
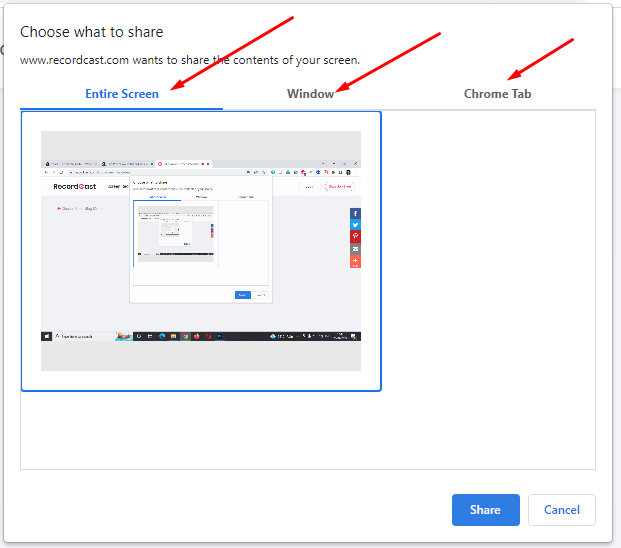
4. Choose an area of the recording
After that, a pop-up window will appear. Select the area you want to record. You are able to record the entire screen, a browser tab, or an application window.
- Entire screen: Capture your current screen.
- Application window: Pick up the applications you are using like Photoshop, media player, etc.
- YouTube Google Chrome tab: You can see many web pages that open on Chrome. Choose the one that opens the YouTube video you want to record.
For example, you can select a specific YouTube page, select the Google Chrome YouTube tab, and then click the “Share” button to start recording the video. Then check on the “Share Audio” box and then click the “Share” button to start recording.
5. Recording
After completing the recording settings, you are recording now. You can return to the browser and then choose “Pause” or “Stop Recording”. Or re-record your video at will.
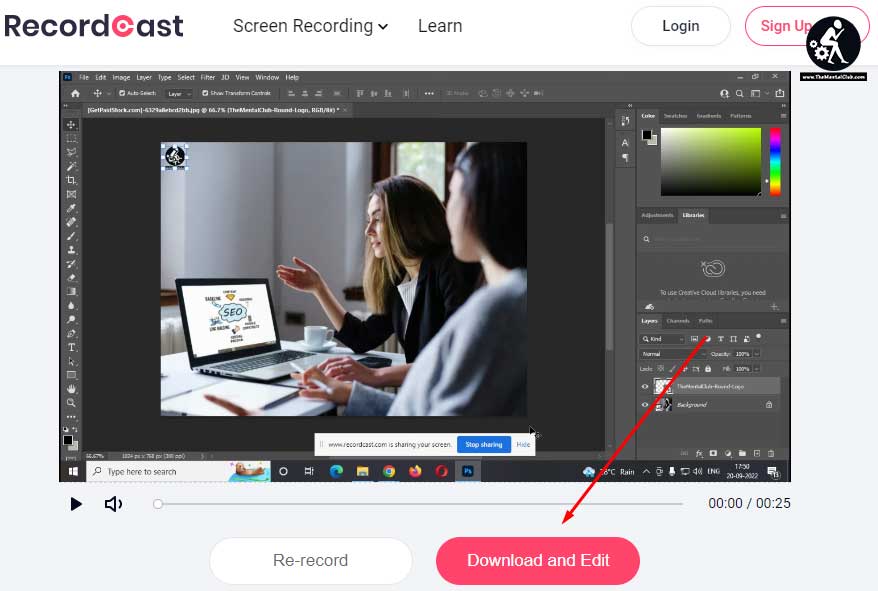
6. Preview, download
After completing the PC recording, click the “Stop” button to preview the screen recording. Now, you can download the recorded video or choose to edit it in the video editor further. To make the video more attractive, I’m going to do some editing to the video now.
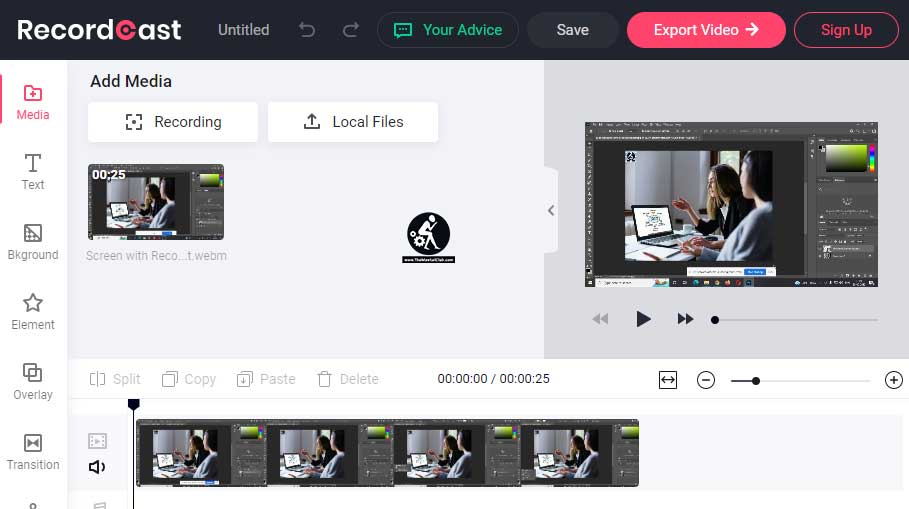
7. Customize the recorded video
After opening the RecordCast video editor, you can use drag and drop dozens of customizable animated texts, colorful backgrounds, and other elements, transitions and ready-made overlays to add a personal touch to your captured videos. Or, you can also import music, photos, and videos from your desktop to supplement the scenes or clips lost in the video recording. Easily cut and split video, etc. Just feel free to experiment with your imagination and inspiration.
8. Export screen recording
Finally, export the screen recording after modifying it. You can export it in a high-quality video up to 1080p for free. You can also export it to a lighter one, such as 480p and 720p. It’s up to you.
Try it out
RecordCast is exclusively for those who want to easily record a computer screen and edit it with the built-in video editor. The is easy to use and free of charge, aimed at making computer screen recording easier.
Congratulations! Now you have a video editor and video without using any other program or tools. It’s intuitively simple to use for everyone.


 Simply")
 – Bangla Typing Software Download")
")


