
You are looking this article because now you are the owner of a Windows 10 PC. You upgraded your old Windows PC to new Windows 10 PC. Today, I’ll tell you, “How to disable auto update of Windows 10 PC?” If you are using the original version of Windows 10, then this article is not for you. If you are using a pirated edition of Windows 10, then this article will be very helpful for you.
You know, I’ve shared, “How to download original Windows 10 ISO with IDM from the official website of Microsoft?“. If you want to activate your windows then you can get Windows 10 Permanent Activator from torrents sites. But, Microsoft can catch your pirated edition any time any moment – if you use their update service or if you try to update your Windows 10 PC.
Turn off Automatic update in Windows 10
You know, Automatic update enable and disable options have been removed by Microsoft in this latest Windows 10 Edition. In the previous version, we can easily enable and disable the automatic update feature. Even this feature has been removed from Windows 10, you can disable the automatic update service easily. Follow the steps below to disable auto update of Windows 10. This trick works on every version of Windows 10 (ENTERPRISE, PRO, HOME, EDUCATION).
How to Disable Auto Update of Windows 10?
You can disable the automatic update service in 6 easy steps. Follow the steps below.
Search for Windows Update:
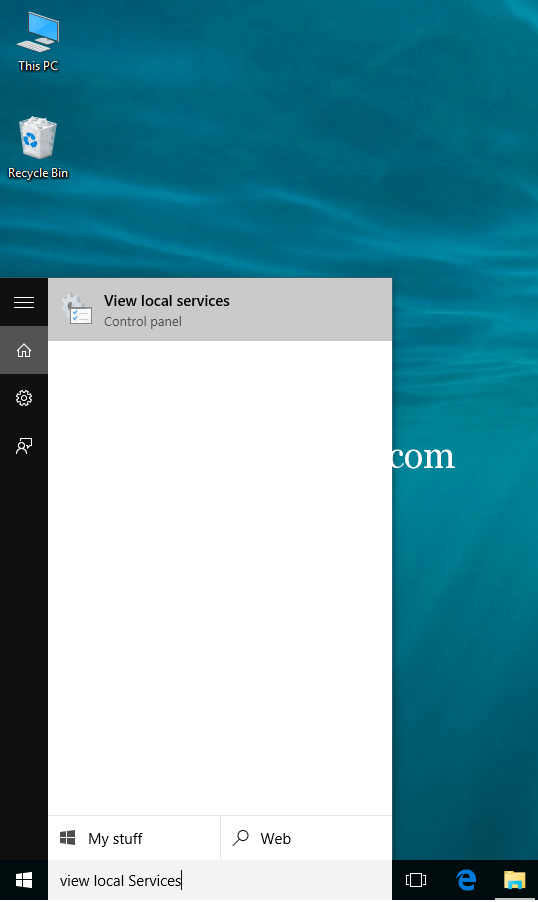
- Step 1:
Type “View Local Services” in the search box and press enter key (See the screenshot below).
- Step 2:
You will see the page like below. You have to select “Windows Update” option and press “Enter” key. You will find it on line no 11 from below.

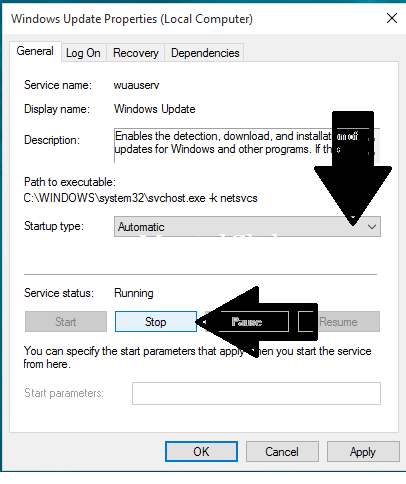
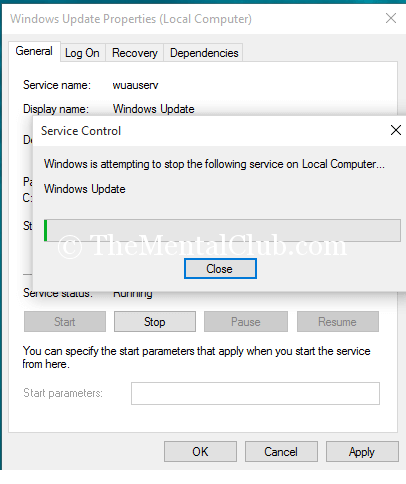
- Step 3:
Now you will see the service running status. Click on “Stop” button and press “OK“.
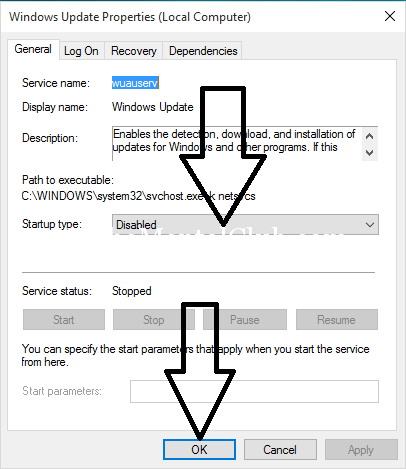
Windows update will disable like below.
- Step 4:
Now disable the startup type and click on “OK” button.
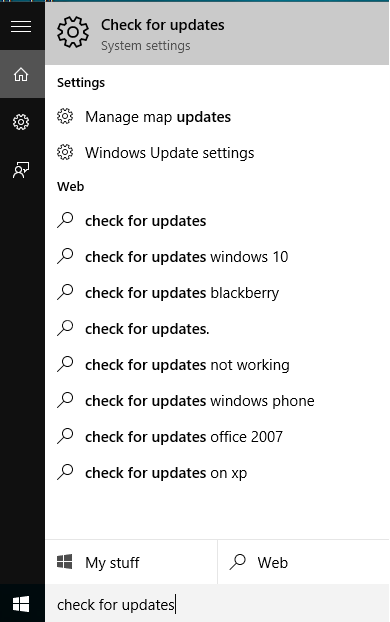
- Step 5:
Let’s check that is it working or not?
Type “Check For Update” in the search box and press “Enter” key.
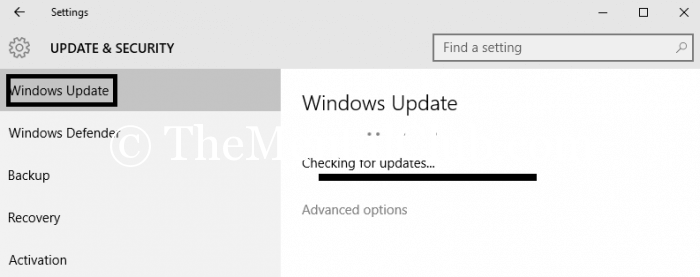
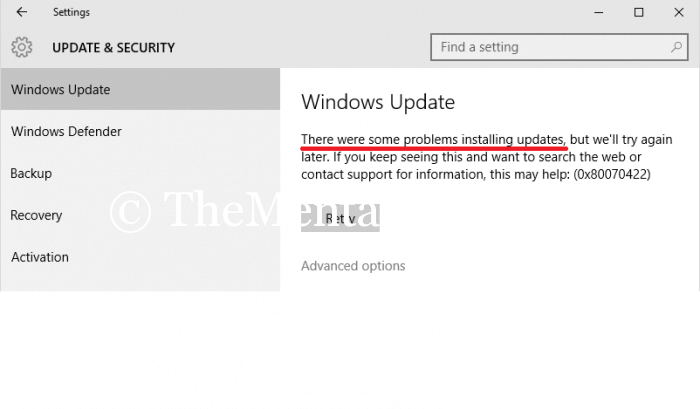
- Step 6:
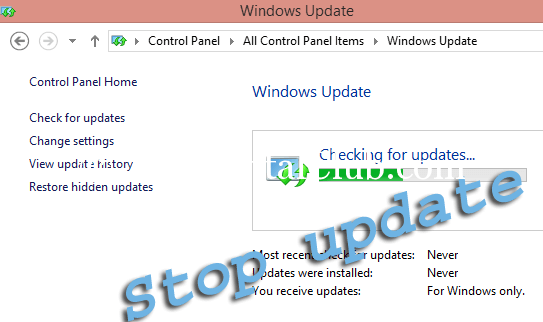
You will see a page like below, you’ve to select “Check Update” option. Windows 10 will show you “Checking For Updates…” message.
Done! Automatic update service in Windows 10 has been disabled successfully – if you see the error message like below.
Thank you…
If you want to re-enable the “Windows Update“, then reverse the steps.


