
Let’s create a free Wi-Fi Hotspot without any software on Windows 10 PC/Laptop. Sometimes, we need to share our broadband internet connection with our friends. But, it is possible, if you are using a Wi-Fi enabled PC/Laptop. If you are using a desktop PC, then it is impossible. Because, desktop PCs have no inbuilt Wi-Fi device. And without Wi-Fi device, you can’t create the Wi-Fi Hotspot. In Windows 10, it is very easy to create. You’ve no need any third party software. Just entering a few commands on Command Prompt, you will be able to create the hotspot. Let’s start creating…
Wi-Fi Hotspot on Windows 10 without any Software

What do you need to create a Wi-Fi Hotspot without any software on Windows 10 PC?
- Wi-Fi enabled Windows 10 PC/Laptop.
- Internet Connection (Broadband or Non-Broadband)
- Knowledge of Command Prompt (Optional)
Procedure of creating Wi-Fi Hotspot without software on Windows 10 PC/Laptop.
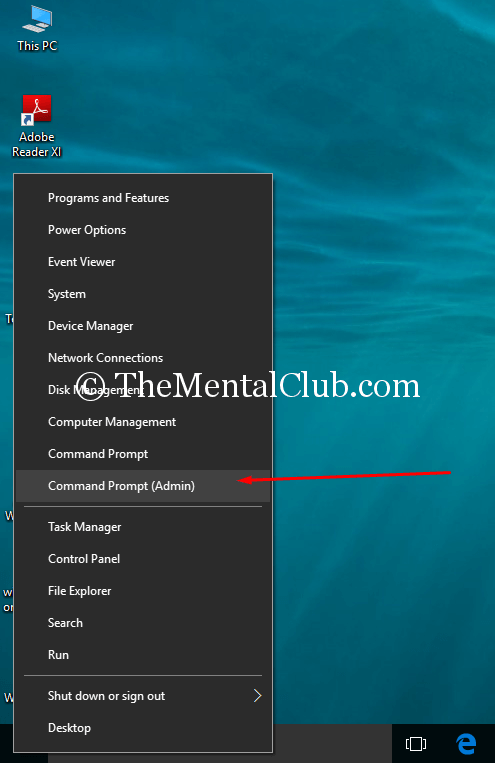
- First: Start ‘Command Prompt’ as administrator.

- Second: Check your PC/Laptop, that supports or not supports the Wireless Hotspot. For checking, type “NETSH WLAN SHOW DRIVERS” commands in the command prompt windows (Without Quotation) and press the “Enter” key..

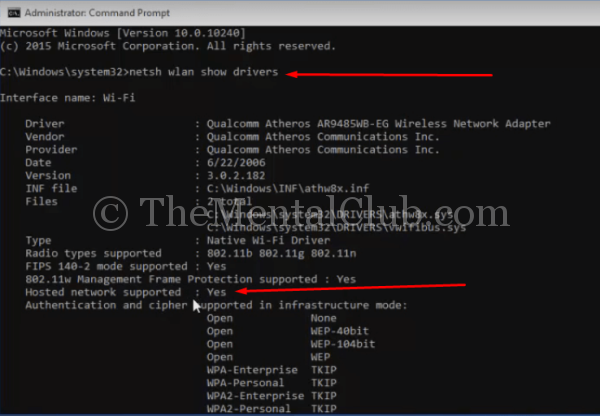
[ If it shows, Hosted network supported = Yes, then you can create a Wi-Fi Hotspot without any software. Otherwise, it would not work for you.]
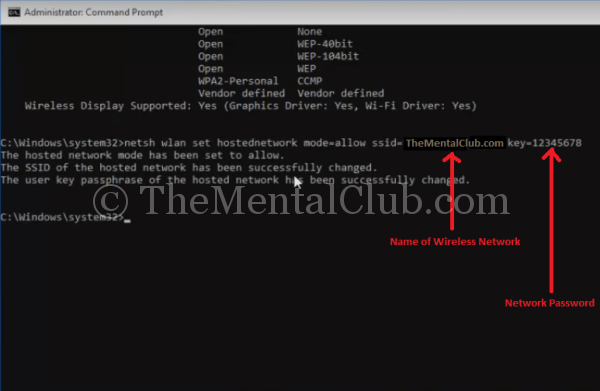
Third: Now create the Hotspot. For creating Hotspot, type “NETSH WLAN HOSTEDNETWORK MODE=ALLOW SSID=TheMentalClub.com KEY=12345678” in command prompt window and press the “Enter” key.

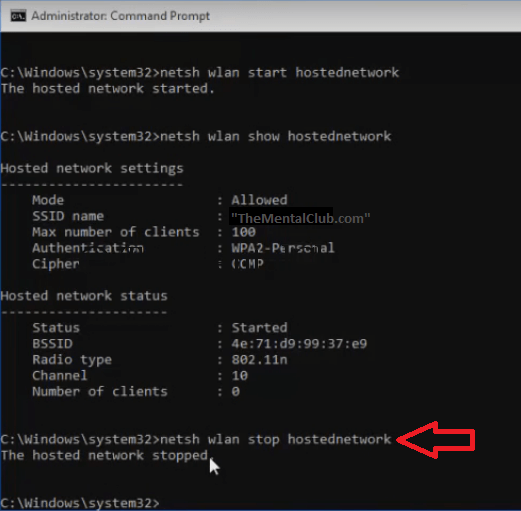
Fourth: Now type the following command “NETSH WLAN START HOSTEDNETWORK” in the command prompt window.
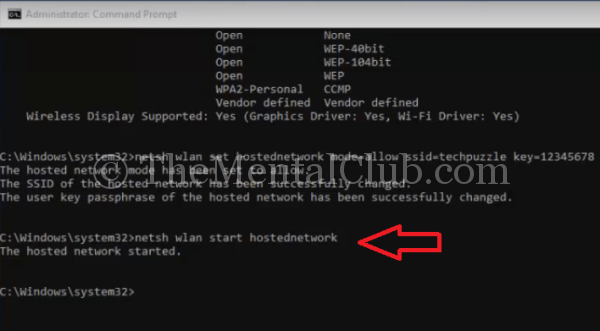

Your Hotspot has been created successfully. But, you can’t use it on your Smartphone or Tablet or others Wi-Fi enabled devices, until you are sharing the connection.
So you’ve to share your connected broadband connection or the connected Wi-Fi network. For sharing follow the steps bellow:
Fifth:
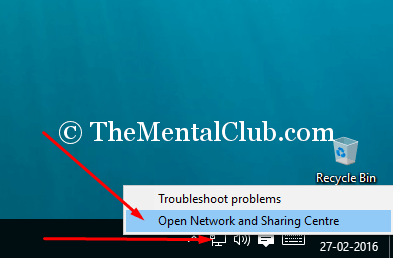
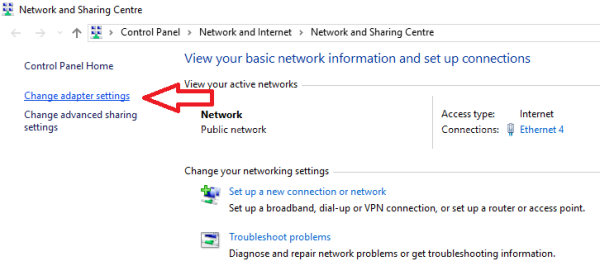
Go to the “Network and Sharing Centre” and click on the “Change adapter settings“.


OR
Alternatively, you can go to the target location through a RUN command. First, open the “RUN” windows and type “ncpa.cpl” without quotation and click on the “Ok” button.
Sixth:
After opening the All Network Connections, you’ve to share the internet connection.
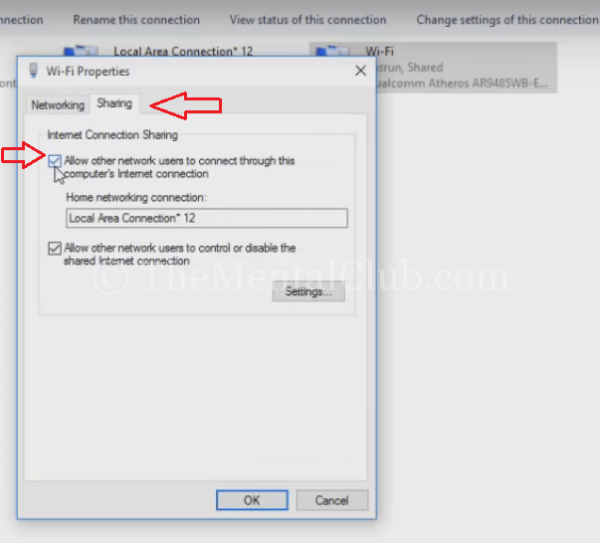
To share the connection, just Right click on the target connection and click on properties.
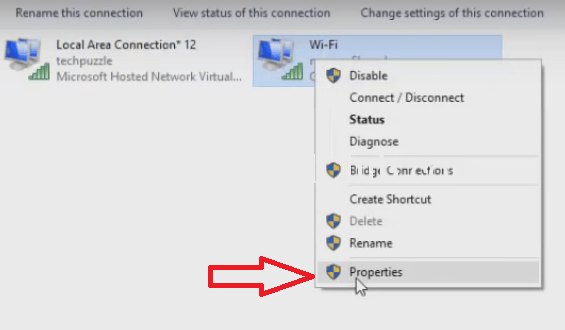

Now, go to the “Sharing” tab and check the tick of “Allow other network users to connect through this computer’s internet connection.” and click on the “OK” button.

OR
If you are connected with DSL cable then, share the network which is connected with DSL cable. The steps of sharing are same.
Now, you’ll be able to access the Hotspot through your Wi-Fi enabled Smartphone or others devices.
How to stop the hosted Wi-Fi Hotspot?
Just type “NETSH WLAN STOP HOSTEDNETWORK” without quotation in Command Prompt.


 Service Testing Started in India")


